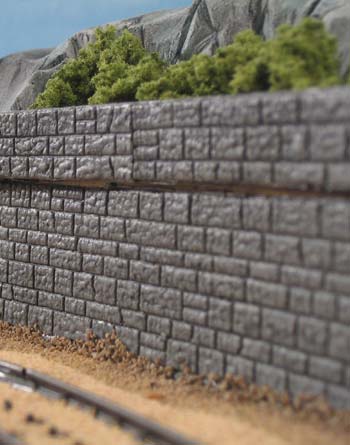
Hints & Tricks - Moulded brick and stonewalls
Looks like a lot of work, but is real fast once the mold is ready

I like to take short-cuts to the best result and here's one which I found very useful. There is a wide range of stone walls, brick walls, tunnel entrances and stone arches available in moulded plastic in our Hobby shops. However, they are quite expensive and the plastic is hard and not so easy to apply. My landscape usually contains a lot of walls, since I have limited space and of course a lot of tracks. Engraved walls are great if you are skilled and lot of time, but I save those for the front part of my layout.


Looks complicated, but is quick
At first glimpse this might look like a lot of work, but actually each section of wall has an effective working time of only 10-15 minutes, which is like 1/4 of the engraved wall.


Making the mould
Brush several layers of release film (available from boat stores) on to the plastic original. Let dry. Mix a batch of moulding epoxy from base and hardener (it's a special type of epoxy also available in boat stores, which doesn't adhere very well on other surfaces than itself and has more the properties of water, rather than the more common though plastic types). Brush a layer of epoxy directly on to the plastic wall and pour the rest onto the piece of 4mm plywood with a frame of 1mm balsa, or Styrene egdes. Put the plastic wall on top of the filled plywood and put it under press under a few books. Let dry for at least 24 hours and remove the plastic original wall.


The moulded wall glued to a curved surface (Not weathered yet).


The mould frame. Backplate of plywood and frame of 2x2mm balsa glued.
Brush with waterbased paint to prevent the white glue to stick to the mould.

   
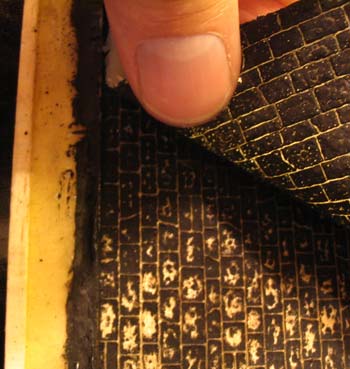
The glue has now dried enough to be removed from the mould.

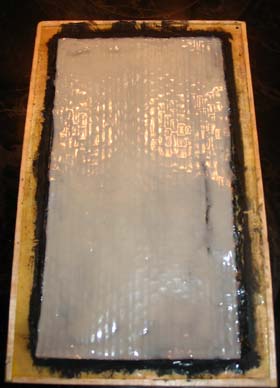
Wall production starts
Once the mould is ready we can start production of copies. First paint the mould with 3-4 layers of grey water based paint (they type they use in Kindergarten you know..) These layers of paint will make the wall easy to remove from mould, also giving it a nice base color. Let dry.


Making the first moulded wall
Once the paint is dry it's time to fill the mould with glue. I use standard white glue for indoor use. It's a very common and cheap type of glue for wood. I apply 2-3 layers of glue to complete one mould. Let dry for a day, or two, then tear it off, starting from one side. Drying time can be reduced if the mould is put on to a radiator. However, don't wait too long before removing it, since the glue gets harder after a few weeks.

The soft stone wall
As you may notice the wall is soft and very easy to apply, even on curved surfaces. Just put it a few seconds on the stove if you want to make it even softer and easier to form. Fix it to the surface using same type of white glue. It sets almost immediately. Painting and weathering can either be made in place, or before, whatever you find most convenient.

Good luck!

/ Martin T

.