| - MRR TUTORIALS - TRACKWORK - MARTINSTOWN | [CLICK HERE FOR SITEMAP] |
MARTINSTOWN
A beginners Model Railroad - The short-cut to the best hobby in the world!
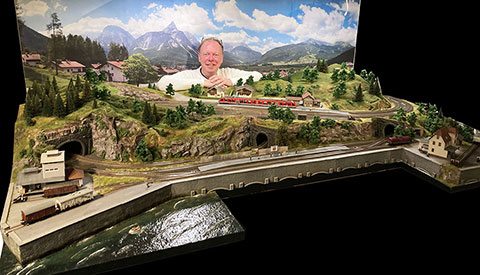
Video Instruction Series - Start to Finish in 10 episodes
Here below is the YouTube Playlist including all episodes of How to build a Martinstown layout from start to finish. Enjoy!
![]()
Be SMART from START!
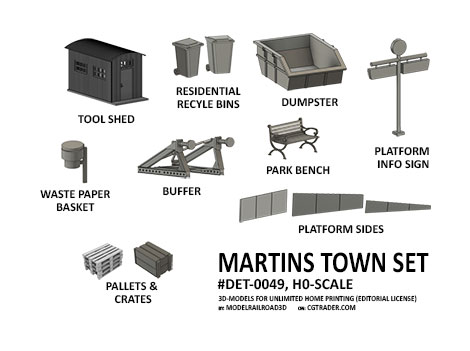
Modelrailroad3D has composed a special "Martins town" set for 3D-print. Get yourself a 3D-printer from start and print all the details you want and need for your Model Railroad. This 3D-items set contains most of the details I used to build Martins town in the video series on YouTube (20 unique items).
- The entire set #DET-0049 costs only $8 USD (equals to aprox €7.50 EURO).
LINK to 3D-model set.
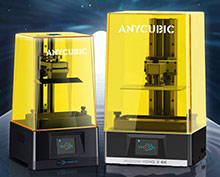
- Recommended 3D-printer is Anycubic Photon Mono 4k.
LINK to Anycubic webshop.
Sub-roadbed and Pillar kit, Noch Gmbh item #53610
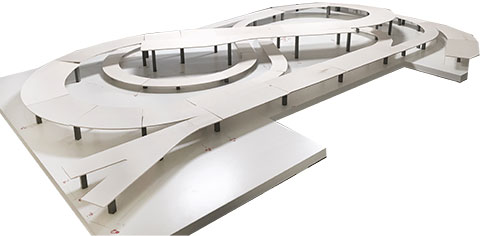
Martinstown Plywood and Pillar set
Outline Dimensions: 150 x 250cm.
The plywood (sub-roadbed) and pillar set can be purchased from
Noch Gmbh using item number #53610. Click on this underlined text to go to Noch website for more product information, price and availability .
Recommended Table system
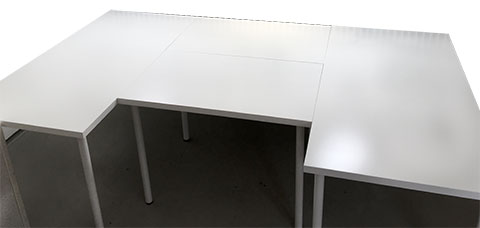
IKEA Modular Table series "LAGKAPTEN"
Qty: Description:
4pcs, IKEA "LAGKAPTEN" Table top 140 x 60cm
16pcs, ADILS Adjustable Table legs with fixing plate
(Original design shown in the photo here was made using IKEA tables LINNMON series. However, several of those items was discontinued in year 2022).
Items Lists for supported tracksystems to build the Martinstown Basic Layout

Item: Qty: Description:
21528, 1pcs, H0 Trix Start Set
62900, 2pcs, H0 Trix Track Extension Set
62094, 5pcs, Straight 9.42cm.
62115, 1pcs, Curve radius 36cm, angle 15º
62130, 23pcs, Curve radius 36cm, angle 30º
62188, 11pcs, Straight 18.83cm.
62206, 3pcs, Curve radius 43.75cm, angle 5.7º
62236, 2pcs, Straight 23.61cm.
62612, 3pcs, Right turnout 18.83cm. (manual)
62977, 6pcs, Buffer/Bumper 8.25cm.
- Download TRIX trackplan for AnyRail
- View the TRIX trackplan image
- Download Märklin M-rail trackplan for AnyRail
- View the Märklin M-rail trackplan image
Item: Qty: Description:
29467, 1pcs, H0 Marklin C-track Start Set
22902, 1pcs, H0 Marklin C-Track Extension Set C2
24904, 1pcs, H0 Marklin C-Track Extension Set C4
24094, 4pcs, Straight 9.42cm.
24172, 3pcs, Straight 18.83cm.
24188, 11pcs, Straight 18.83cm
24130, 20pcs, Curve radius 36cm, angle 30º
24206, 3pcs, Curve radius 43.75cm, angle 5.7º
24236, 2pcs, Straight 23.61cm.
24611, 3pcs, Left turnout 18.83cm. (manual)
24612, 4pcs, Right turnout 18.83cm. (manual)
24977, 8pcs, Buffer/Bumper 8.25cm.
Items lists for the extra tracks needed to build the Staging Area (Shadow Station)

Item: Qty: Description:
62672, 1pcs, Turnout Right Curved
62130, 7pcs, Curve radius 36cm, angle 30º
62230, 2pcs, Curve radius 43.75cm, angle 30º
74491, 4pcs, Turnout Motor for Märklin/Trix C-track
60832, 1pce, Digital Decoder for Turnouts.
- Download TRIX trackplan with Staging for AnyRail
- View the TRIX trackplan with staging JPEG-image
Item: Qty: Description:
24671, 2pcs, Turnout Left Curved
24672, 2pcs, Turnout Right Curved
24130, 8pcs, Curve radius 36cm, angle 30º
24230, 2pcs, Curve radius 43.75cm, angle 30º
74491, 4pcs, Turnout Motor for Märklin/Trix C-track
60832, 1pce, Digital Decoder for Turnouts.
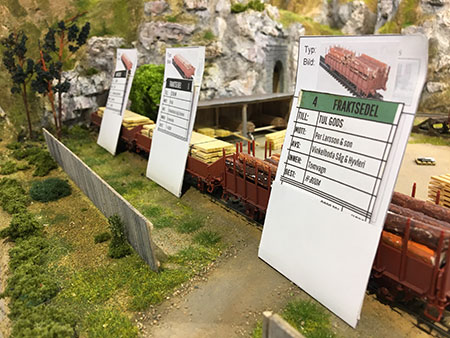
Once completed, you can run both passenger traffic and freight.
Here are templates for the freight traffic using Waybills & Carcards:
(Both documents are Microsoft Excel Spreadsheets for version 97 or newer)
"Your series of videos of building a model railroad from scratch was the ideal inspiration to (re)start model railroading after leaving my old Märklin HO scheme with my parents 30 years ago (it is still somewhere under the roof there I guess).
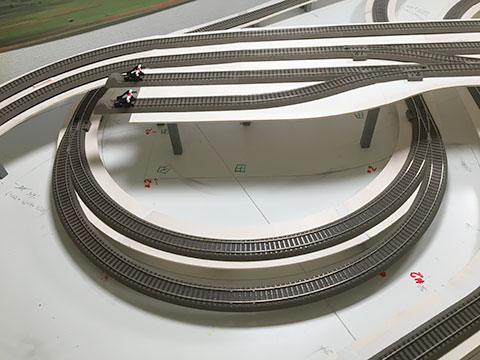
I chose N scale due to lack of space. As I am using a Mac I designed the track with RailModeller Pro and decided to work with Minitrix system. As Minitrix track variety is not a 100% identical with Märklin HO I had to adapt your scheme slightly to make it fit. Finally it fitted perfectly on a standard 1.50x0.75m standard table.
The starter kit 11100 was the right start, adding further tracks as needed for the layout.
I ordered the plywood for the track at an online laser cut service which turned out as the right decision as I am not a sawing pro and saved me lots of time and heaps of sawing dust. It wasn’t that expensive either. In difference to your tutorial I made the pillars myself from thicker plywood, anyway I had to do some trial and error for the right elevation - the ideal slope according to the layout Software was not sufficient to manage the heights needed e.g. at the tunnel entrances underneath the upper station section. But finally I managed to find a good compromise.
For cushioning the tracks I bought a mat of 3mm self adhesive black foam rubber („Moosgummi“ in German) and cut it into 2.5cm stripes. It sticks well on the plywood and is easy to handle even in curves as it’s very flexible.
The rest I did step by step according to your tutorial up to the current status which is far from being finished but already quite good looking.
Taking a table as base is good and simple for a quick start but has one disadvantage I discovered this weekend - supplementary electrification is quite puzzling as every cable has to find its way through existing holes - and the inner height underneath the landscape is only half of HO scale. Street lights along the quayside were challenging… But that’s a minor disadvantage compared to all the fun I had building the scheme during the last year - yes, a year has passed since my first steps on the layout program!"
/ Carsten
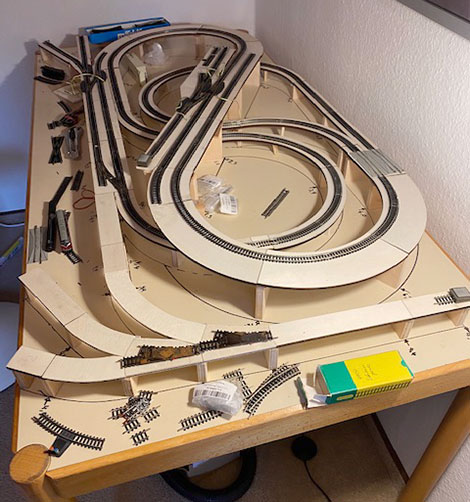
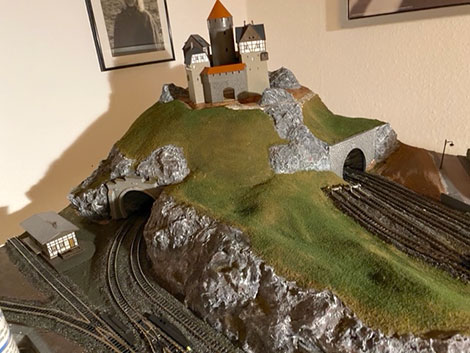
H0-scale version Martinstown by Arjan, Netherlands
Hello Martin,
Inspired by your sheer enthusiasm and, in my personal opinion, great Martin Town track lay out, I decided to enter the model train hobby since I thought this was a good moment as I just went into retirement.
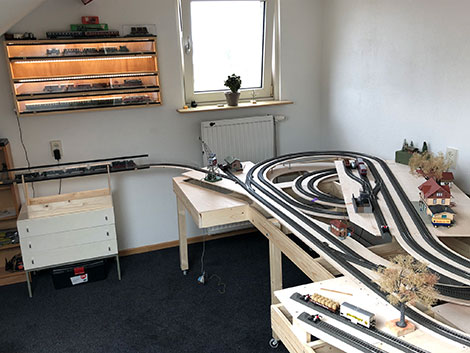
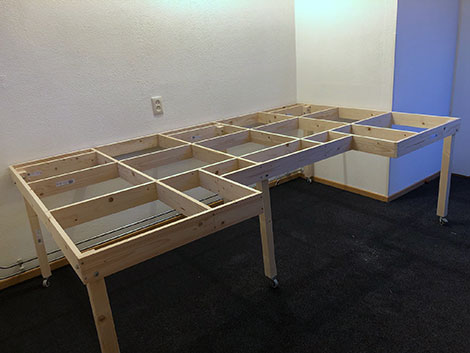
Since I already noticed the issue with the IKEA table, I decided to start to build my own wooden construction which I recently finished. Although still a lot to be done, for which Im looking forward, Im now already in the position to drive my trains and it has to be said the lay-out is amazing with respect to the possibilities given the small dimensions. I love the switching possibilities but also the fiddle yard solution as hidden by the ferry boat option is so smart! As a bonus I also included the shadow stations as well.
What would be great, as for a future video, is how to integrate a smart (less expensive) block system in this lay-out giving the possibilities to run with multiple trains in a more safe manner Attached please find a few pictures of my work so far and feel free to publish if you want. Again, thank you for your sharing your knowledge and inspiration
Best Regards, Arjan