| - MRR TUTORIALS - CONTROL - DIGITAL DCC AND MFX |
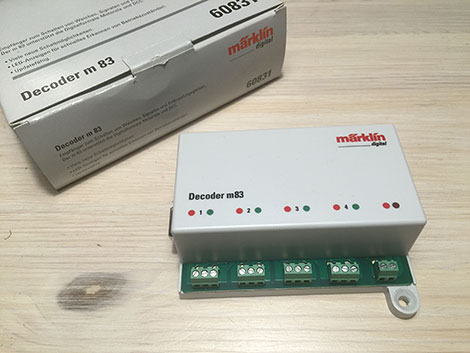
Dekoder m83 (Märklin 60831)
The little gray (or now black) box which controls everything your turnouts and animations.
In 2013, Märklin finally released a replacement for the more than 30-year-old k83 decoder. Märklin has succeeded in lifting the new decoder M83 (Märklin #60831) a lot compared to its predecessor k83. So much so that I decided on a total replacement of all decoders, despite the extra cost and work.What are the benefits of m83 vs k83?
The Märklin 60831 has several well-thought-out major advantages over its predecessor k83. They include:
- Increased switch power (with connected DC supply). The turnouts now sound: "Tjack-Tjack", instead of "Schlooorrk-Schlooork" with the k83.
- Direct cable connection of consumers via screw terminals (instead of the small banana contacts on k83).
- Selectable Motorola or DCC protocol (instead of just Motorola protocol on k83).
- Jackable through the 9-pole side connector saves a lot of time and cables when connecting several decoders.
- Connection connector for direct 19VDC supply to power consumers (relieves your CS2 or Booster from loads that do not yet need digital code in the supply. Tex gear motors, lamps in houses, courtyards and the like).
- Indicator lamp that lights when the output is active.
- Indicator lamp that blinks when the decoder is "On-Line" with CentralStation 2.
The instruction manual is a bit confusing
However, there are parts of the instruction manual that can be a little confusing. This article explains the feature and works out the problems I had when I started working with the decoder.
The default settings that come pre-installed in the m83 work well for turnouts and decoupling tracks, but the possible settings in the decoder provide fantastic opportunities to animate the lights on your layout. To take advantage of this, you only need to program the outputs using DCC and the values from the CV table in the manual. Unfortunately, this is where the manual is a little unclear.
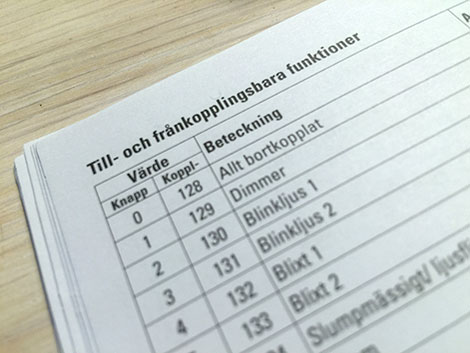
"Button Value" and "Link Value"
The table in that manual talks about a "Button Value" and a "Link Value". It is a little unclear to me why Märklin chose to divide the various CV values in this way. "Button value" means things you can do with a button (for example, turning on a flashing light or turning on a lamp). "Connection value" means settings you can make with a switch connected. This means that you sometimes need to use "Button value" as the CV value and at other times "Link value".
| CV adress | Output |
|---|---|
| 112 | Output 1 Red |
| 115 | Output 1 Green |
| 118 | Output 2 Red |
| 121 | Output 2 Green |
| 124 | Output 3 Red |
| 127 | Output 3 Green |
| 130 | Output 4 Red |
| 133 | Output 4 Green |
| CV Value | Description |
|---|---|
| 16 | "Period" * är den maximala växel tiden |
| 17 | "Period" * är den minsta växel tiden |
| 18 | Växeltid är "Period" * eller tills stoppet nås |
| 128 | Outputen är avstängd |
| 129 | Dimmer |
| 130 | Blinkande ljus 1 |
| 131 | Blinkande ljus 2 (tänd när "Blinkade ljus 1" är släckt) |
| 132 | Blixtljus |
| 133 | Dubbelt blixtljus |
| 134 | Slumpmässigt flimrade ljus (Typ Trasiga/Dåliga lysrör) |
| 136 | Zoom (mjuk av/på växling) |
| 137 | Mars |
| 138 | Gyralight (Liksom på amerikanska järnvägar) |
| 141 | Lysrör. Emulerar lysrörsblinket vid tillslag. |
| 142 | Lågenergilampa. Emulerar tillslag av lågenergilampa. |
How to change function on one of the m83's Outputs
First, set the decoder DIP switch number 10 to "on", DCC protocol.
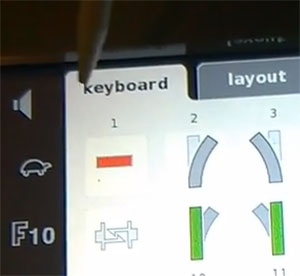
1. Välj fliken "Keyboard" på din CS2:a
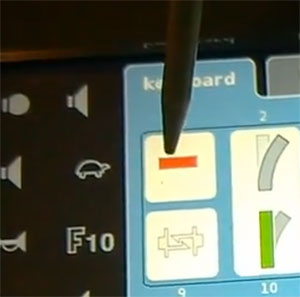
3. Välj den Output som du vill ändra.
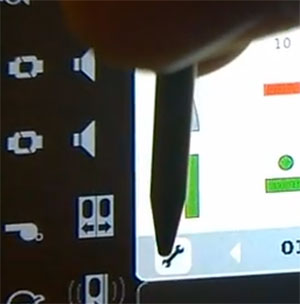
2. Välj verktyget
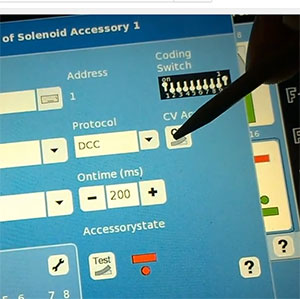
4. Välj "CV Access"
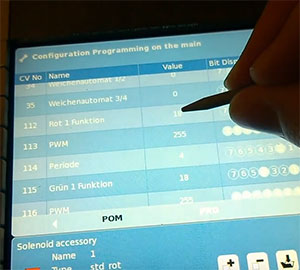
6. Klicka i rutan som anger nuvarande CV-värde. Mata sedan in nytt värde i rutan.

5. Välj "POM" för att kunna ladda direkt till m83:an
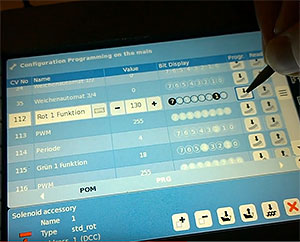
7. Klicka på pilen ner i växeln för att spara det nya värdet.