Diary layout year 2012 - 2022, Tullinge
2013-03-08:
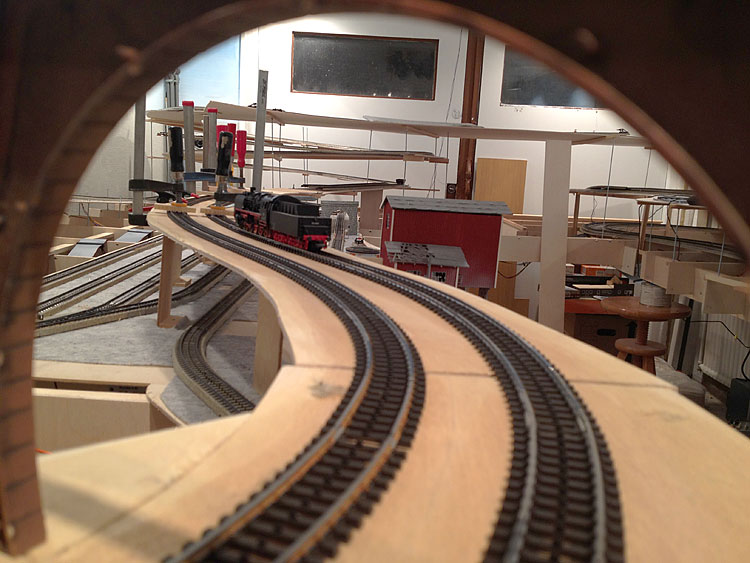
Somehow I never though I would lay K-flex. Hahaha. Anyway. Here I am . :)
Hey I like it! No! I actually LOVE it! It was a simliar leap forward as moving from analogue to digital...
Okey.. I didn't say that...
2013-02-28:
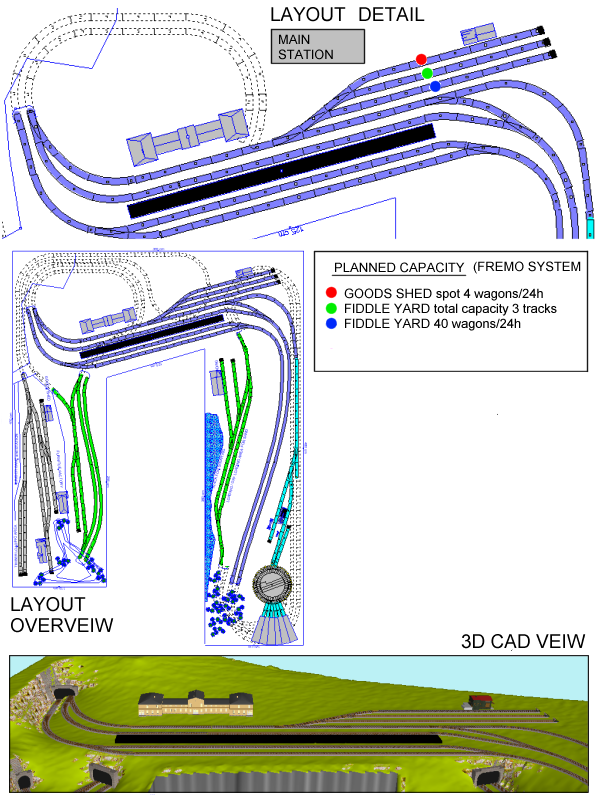
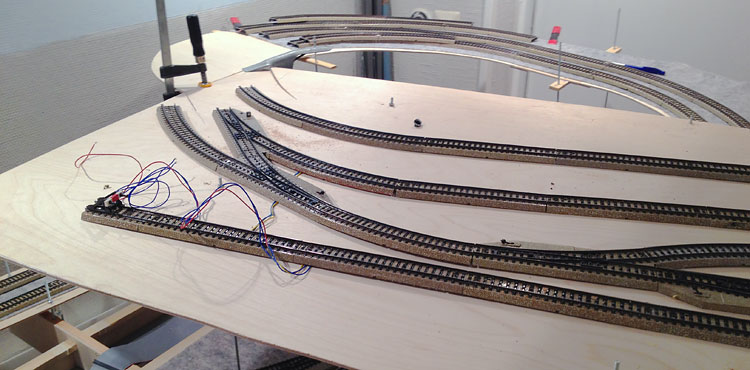
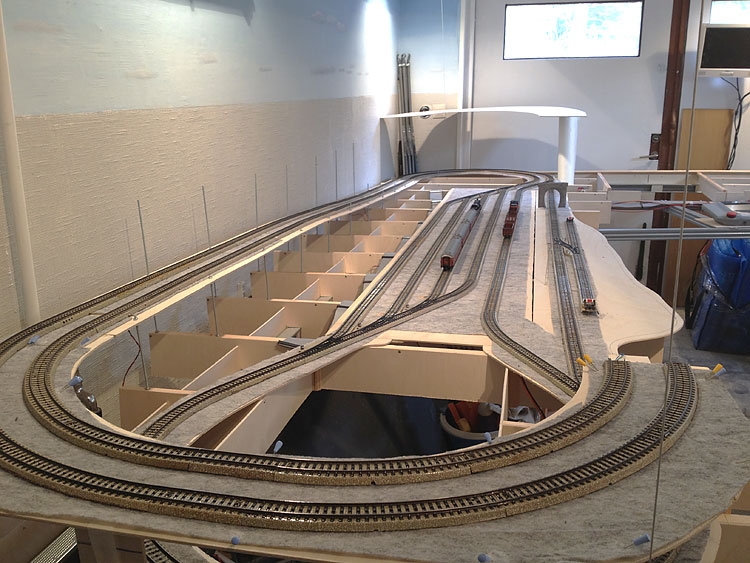
Mainstation plate now cut to size and attached to the helix. Very preliminary trackwork made of the station on these pictures. That goes for the trackwork in the helix too. By assembling this I passed the count of 300pcs M4 hexnuts used. :)
2013-02-27:
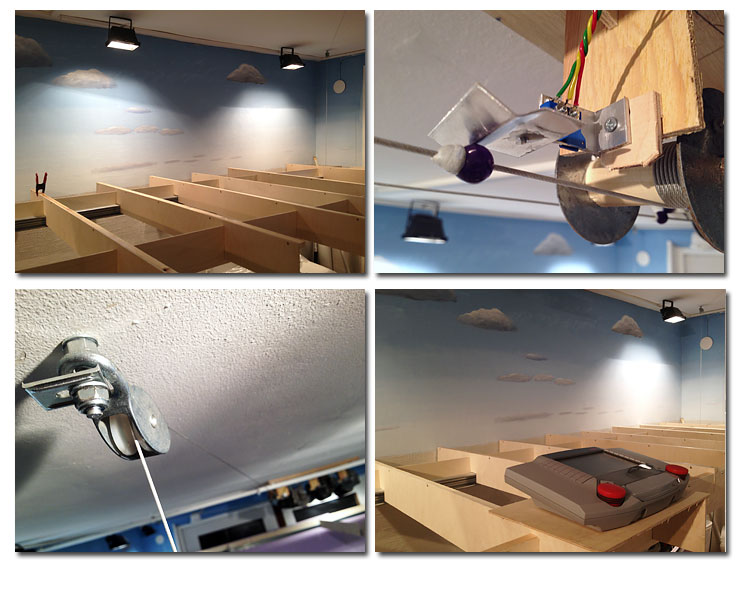
I'm starting to get really frustrated sawing plywood. I've added like 5 sheets of 1200 x 2400mm and I still need more. Arrrg!
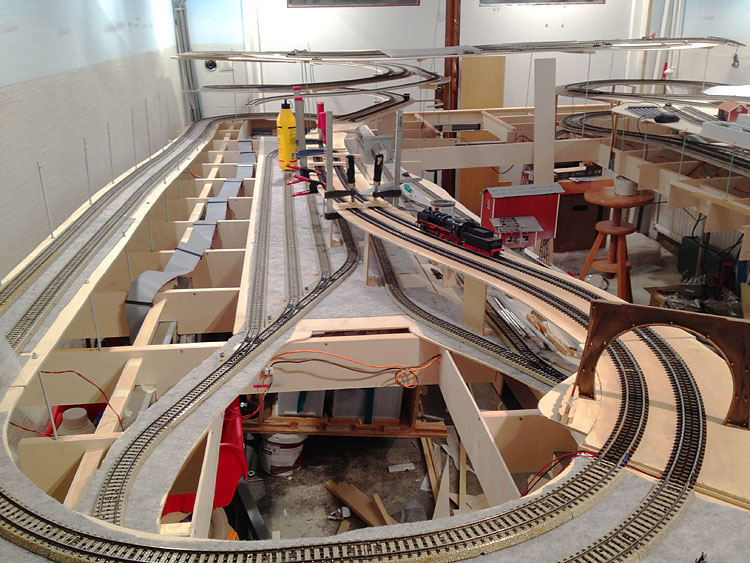
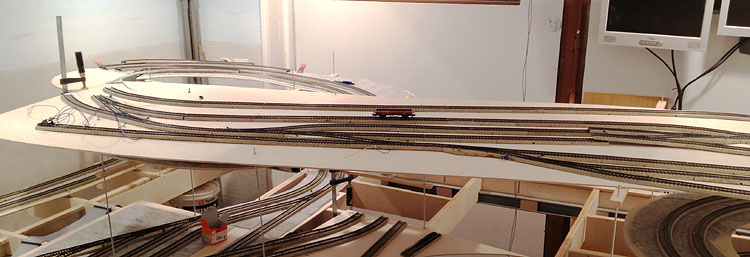
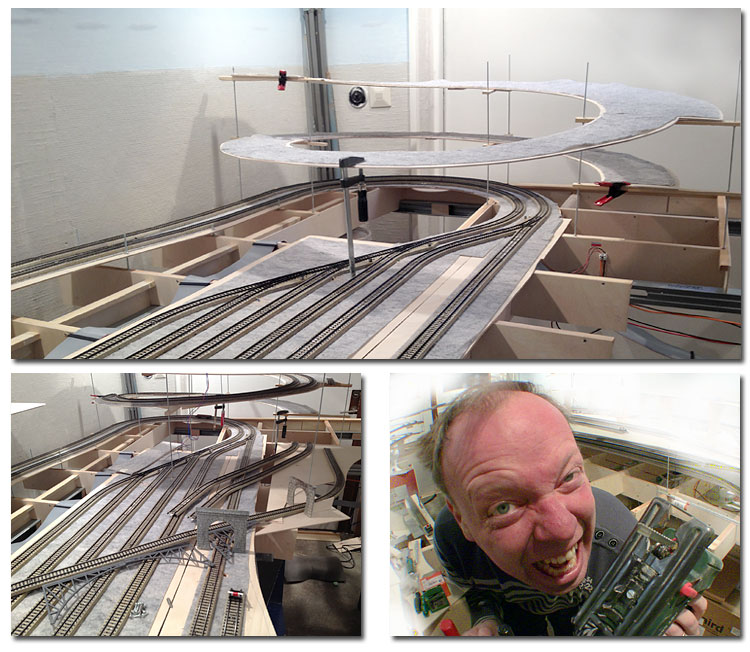
Anyway... The helix is in place. It needs adjustments and also a couple of more supports. The uppermost picture is showing first preliminary setup. Lower image show it in a more ready-like state. The photo to the lower right is... a very frustrated artist.. Yeaaah! Artist man!
2013-02-22:
Today I finalized the ramps up to the second level in both Western and Eastern landscape. On the west side will climb up the trains on the 130mm and the east up to the full 185mm.
I have also realized that it will be necessary to cut the 2-3 beams in the table in the middle of the four corners. This is to facilitate access of the tracks in the shadow yards and in turn loops and helical ramps.
Today I also completed the equivalent line schedule for the railroad with blocks, sensors and signals. I have chosen a rather simple signaling completely without regard to the prototype. Yepp, that's how I do it!

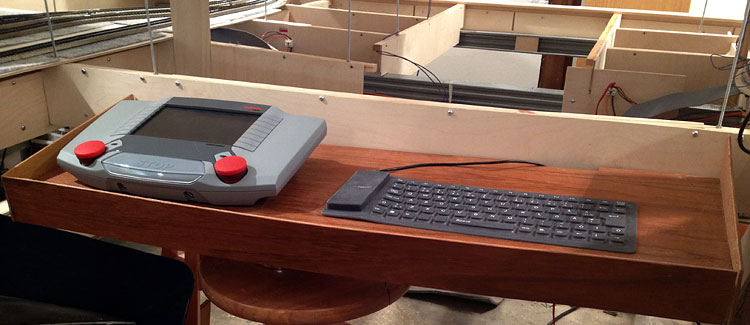
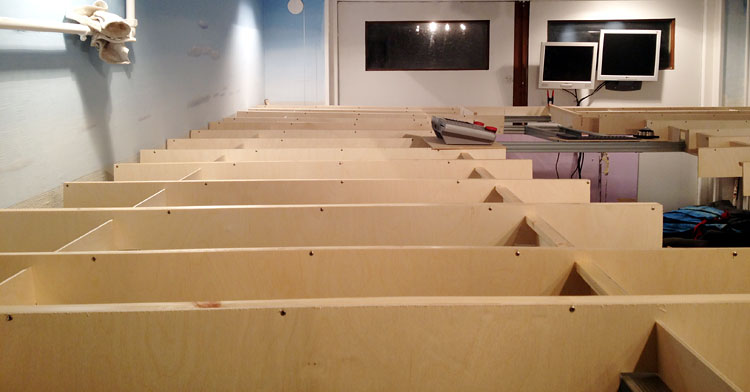
In the final phase of my previous layout I built a large and nice shelf in Teak plywood. This would accommodate my Märklin Central Station 2, Laptop and computer mouse + Router. I put a lot of love on the curved sides and complex shapes that would match CS2: an. Now, I realize that I never ever will have room for this operator panel on my new layout. The shelf goes in the garbage and instead I will be aiming to build a minimalistic operator panel. It's not very often that what you thought was great yesterday, will do tomorrow ... Here it is anyway.. For the last time..
2013-02-17:
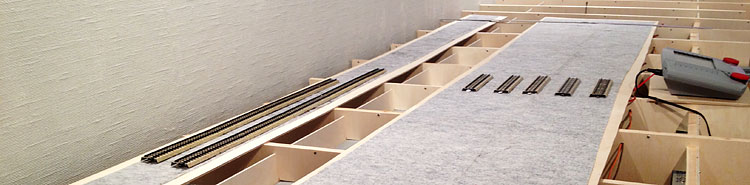
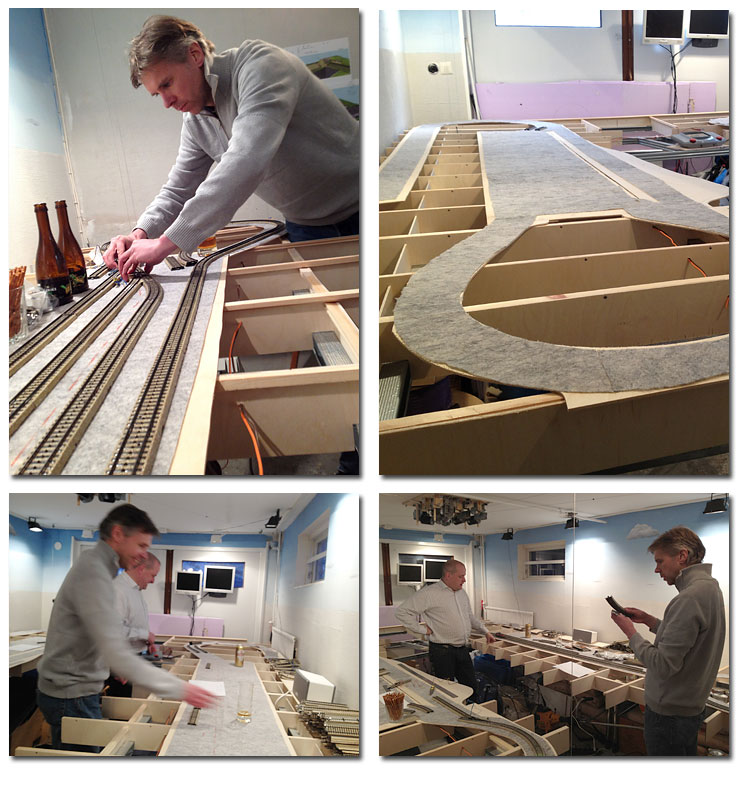
Two of my MRR friends came over to participate the formal lay down of the first tracks on the new layout. I have prepared by gluing noice reducing textile on to the plywood and also been taking some measurements of where to place the first tracks to make it all fit properly in the end. We had a very nice night together built both shadow stations and the ramps up to the second level. After this we had a sauna and some more beers. :)
2013-02-13:
The framework neccesary for the kick-off party is done! Pffffuhh! I Have invited a few friends over to lay out the first pieces of tracks on my new layout. The left and the right side of the table has a bit of a slack towards the middle. Not good! I need to increase the stiffness and maybe build in a negative U-shape, so the table is absolutely straight when it's hanging in the wires. I think I need one of those laser measurement equipments to get all of this straight. Hmmrrrff!
2013-02-11:
I completed the left half of the table today. The construction using L-girdle seems successful and its stiffness has been overshooting my expectations so far. My only concern is if the motors can handle the weight of the completed layout.
2013-02-08:
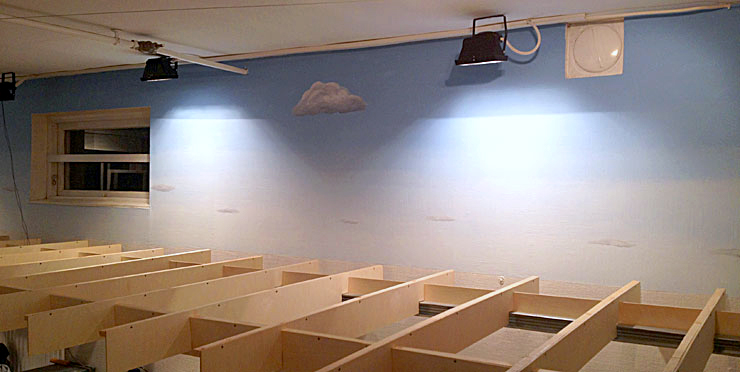
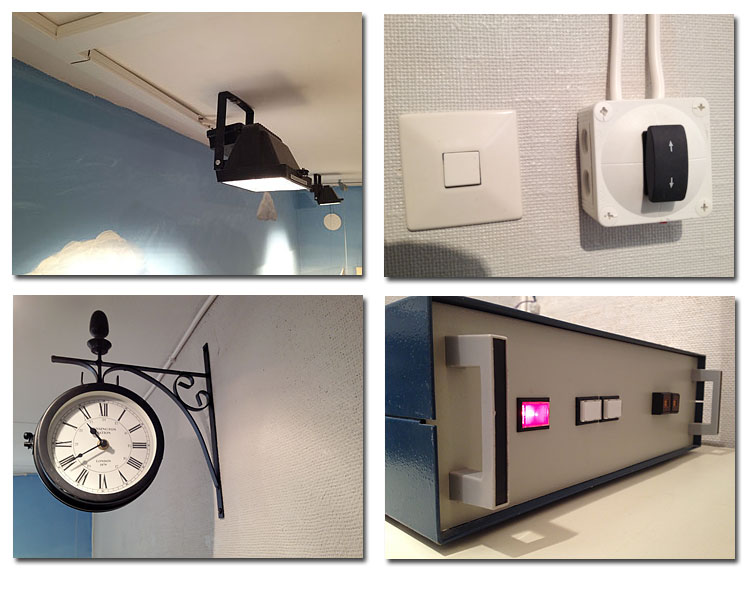
Wow! Today I switched on the ten 120Watt halogen armatures, which I have been mounting in the ceiling. This concluded two weeks of work installing the necessary 230VAC electricity wiring in the garage.
I started to paint some clouds on the walls happy about the sudden daylight in my otherwise dark garage. It looked real simple on Youtube, but turned out to be somewhat more difficult. "How to paint fluffy clouds"..
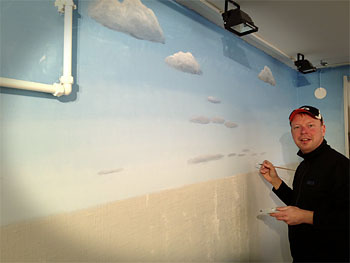
Mr: Martin T Picasso painting (or more like tries to paint clouds)
Space available:
- The preliminary idea is to fill the available space of 3050 x 4810mm with a U-shaped table.
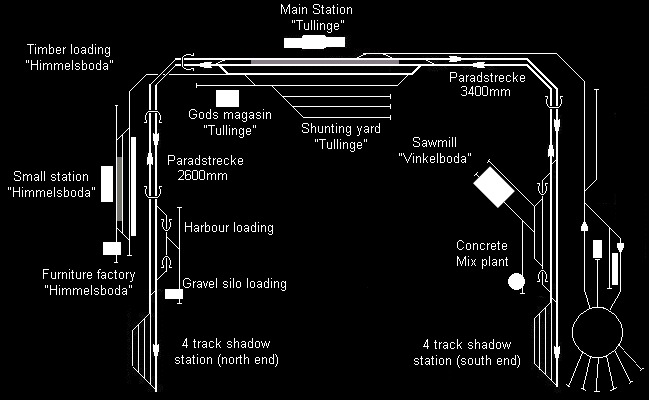
So far I made a principal sketch of how the main lines and the sidings will connect to each other.
I know there many of you has a lot of expertise in this field, so I will leave it here a few weeks hoping to get some input before I go any further.
Schematic diagram:
Revision history for principal drawing above:
A - Initial.
Project planning phases:
1. Schematic functional diagram. - READY. See above
2. Principal design of actual track layout according to functional diagram. - READY, WAITING FOR USER INPUT.
3. Design of hights and helixes on the track layout.
4. Design of sensors and blocks according to Rocrail standard.
5. Design of landscape around the track layout.
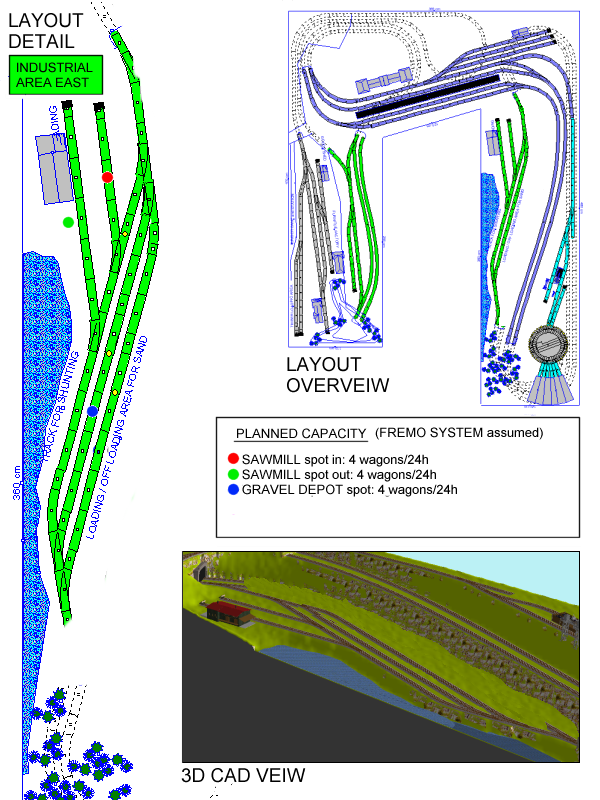
Here's my planning of the East Industrial Area.

However, my wife thought I should remove the mainlines, since it just duplicates the mainlines one level up.
This would give more room to make a better scenario in terms of landscaping and improve the general look.
What do you think?